
The Freemium Starter Kit is a comprehensive asset package designed to help mobile game developers create freemium games quickly and efficiently. With pre-built systems for inventory, crafting, quests, purchases, and more, developers can focus on game design while effortlessly integrating features like audio and UI management, along with social media sharing. Boosting player engagement through collectibles, quests, and daily rewards. Save time and make money with region-based ads, in-app purchases, and a robust feature set designed to enhance user experience and monetization.
Getting Started
-
Prerequisite
The following Packages are required for the example game to work. Please install them from the package manager if they are not already installed.
-
Post Processing- "com.unity.postprocessing": "3.2.2" - You can get this from the package manager. -
TextMeshPro- "com.unity.textmeshpro": "3.0.6", The importer window should already be open. Just click Import TMP Essentials.
-
-
1: Open the ExampleScene.unity from
Assets/RFI.Freemium/Example/in Unity - 2: Play around with the Example game. It shows off most of the features of the Freemium Starter Kit.
- 3: Open the Example version of the editor from the Unity Menu at
Window > Freemium Starter Kit > Demo > Example EditorIt is important to open the Example Editor as the main editor will force you to go through the setup(we will get to that later)
- 4: Go through the Example Editor screens and see what all you can do. In the editor you will see links to YouTube videos describing each screen. Also hovering your mouse over the little question marks will give you a brief explanation of a given control.
- 5: Read the Example Code Notes from the menu on the left, to get a better understanding of what you will find in the code.
- 6: Look through the source code and see how the example game is created.
- 7: Now you are ready to go through the One-Time Setup and begin adding the Freemium Starter Kit to your game.
Note:
It is important to note that the Freemium Starter Kit is a large complex system. It is designed to save mobile game developers a lot of time and effort, but it is by no means a plug and play product. You will need to read the documentation, watch the videos, and write some code to get everything working.
Join our Discord Server
One-Time Setup Instructions
Initial File and Folder Creation
-
Open the FSK Editor window from the Unity Menu at
Window > Freemium Starter Kit > Open Editor - The FSK Editor will open to the One-Time Setup screen which will walk you through the setup process.
- The first thing you need to do is click the File Setup button on that screen to automatically create a couple of new files and folders in your project.
- After clicking, there will be a brief pause while Unity compiles the new scripts.
- The screen will refresh automatically once the compile is complete. Please wait until the screen refreshes.
Manual Steps
Setting Up Your Scene
- In your project, open your starting scene or create a new scene and set it as the starting scene.
- With the scene open, right-click inside the Hierarchy tab to bring up the popup menu.
- Near the bottom of the menu, you should see an option that says Freemium Starter Kit .
- Select Freemium Starter Kit then One-Time Setup.
That's it! You are done with the One-Time Setup. Click the Next Step button at the bottom of the editor screen to continue.
Screen Builder
The Freemium Starter Kit introduces a unique approach to UI management, centralizing each UI screen into a standalone prefab and script. This design allows for individual UI screens to be managed as cohesive units. Unlike the typical Unity workflow, where scripts referencing UI elements are attached to objects within the prefab, the scripts actively load and manage the prefab itself. This method might seem unconventional at first, but its simplicity and power are likely to impress once familiar.
To ease the transition to this new approach, the Screen Builder tool has been provided.
Using the Screen Builder
The Screen Builder facilitates the creation of UI prefabs and the automatic generation of base UI scripts. Follow these steps to get started:
- Launch Screen Builder: Open the Screen Builder UI within the Freemium Editor.
- Configure Settings : Specify the storage locations for your prefabs and scripts. You can accept the default settings or customize them to your preference.
-
Build the UI Screen
:
- Step 1 : Name your screen and click the 'Create' button to generate a new base prefab.
-
Step 2
: Click the 'Open Editor' button to edit the prefab in the Unity scene editor. Now you can add UI components like buttons, sliders, and toggles directly to the scene, like you
normally would. However, there are a few exceptions:
- Exception 1 : It's not necessary to attach scripts to UI elements. Scripts can be added for animations or effects if desired, but they will not be needed for things like button clicks.
- Exception 2 : The naming of controls is crucial for the Screen Builder to generate a functional script. By default, it creates references for any Button, Toggle, Slider, or ScrollRect included in the prefab. For Text and Image components, references are generated only if their names are prefixed with "ref_", which is the default setting but can be modified in the UI. All TextMeshProUI and Image components with the "ref_" prefix will automatically have references in the script.
-
Exception 2.5
: To automatically link a TextMeshProGUI component to a key stat, enabling it to display the current value of that stat while the UI screen is active, include one of the
following key phrases in its name:
statcoin: Displays the current coin count.stathealth: Shows the current health level.statenergy: Indicates the current energy level.statkey: Shows the number of keys.statstar: Displays the current star count.statspin: Indicates the number of spins.statgem: Shows the current gem count.stattimelife: Displays the remaining time for health regeneration.stattimeenergy: Shows the remaining time for energy regeneration.-
statlivesof: Displays the current health as a ratio of the maximum (e.g., 4 of 5).
- Step 3 : Select the UI Prefab. This may already be done of you didn't close the Editor window, but if you did just select the UI Prefab that you created. Unselect any UI Control types that you want to ignore and then generate your script.
- At this point the script file will be in the Code Path that you configured in the Settings and it will be named the same as your Screen Name with a .cs extension.
This streamlined process not only simplifies UI development but also enhances the flexibility and scalability of your UI designs.
Screen Object API Details
Overview
In the Freemium Starter Kit each UI screen is controlled by a new script object inherited from ScreenBase or StatScreen. These objects are responsible for loading, managing, and displaying the UI prefab. Each screen object gives you (the developer) a ton of properties, methods, and events to make managing the UI a simple and easy yet powerful process. All of the properties, methods, and events are listed here, but you should refer to Assets/RFI.Freemium/Example/Scripts/Screens/DemoEventExplanation.cs for more details on the events and explanations on how to use them.
The methods and events described below provide a structured approach to managing the lifecycle of a screen within an application, offering hooks for initialization, regular updates, pausing, resuming, and cleanup.
Class: ScreenBase
Fields
_IsDying: A bool field that sets whether the UI container is dying or not._IsPaused: A bool field that sets whether the UI container is paused or not._IsClosing: A bool field that shows if the UI container is closing._IsClosed: A bool field that shows if the UI container is closed._IsLoaded: A bool field to check if the UI container is loaded._IsLoading: A bool field to check if the UI container is currently loading.-
_IsVisible: A bool field that indicates if the UI container is currently visible or not. _IsShown: A bool field to check if the UI container is shown.-
_ScreenObject: Reference to Unity GameObject container that holds all of the components for the screen. _PrefabName: Reference to the name of the UI Prefab that is shown for this screen.-
_ScreenPrefab: Reference to the UI Prefab that is shown for this screen. A Prefab is required for every screen. You can also use theLoadPrefabfunction to create references to other prefabs as needed._ScreenPrefaballows you to easily get references to the UI controls inside the UI Prefab. After the screen's class constructor is finished it will be available at any time. However: It is important to note that the following functions for_ScreenPrefabshould primarily be used inside the ConstructGUI event where their results are cached. Outside of the ConstructGUI event Unity will have to reload the controls from the Prefab with each call. -
Function details:
GetButton: function that retrieves a reference to a Unity Button by its name.-
GetTextMeshPro: function that retrieves a reference to a TextMeshProUGUI by its name. -
GetTransform: function that retrieves a reference to a Transform component by its name. GetImage: function that retrieves a reference to an Image component by its name.GetSlider: function that retrieves a reference to a Slider component by its name.GetToggle: function that retrieves a reference to a Toggle component by its name.
-
_GlobalManager: Reference to the GlobalManager that is automatically available on every screen.
Methods
-
LoadPrefab: Used to fully load and initialize a UI prefab other than the main UI for this screen. This will return an object just like_ScreenPrefab. -
CreateTimer: This method is used to create a timer callback that fires at a given interval. -
CloseAction: This method allows to leave a screen through different ways identified by flags. Internally it firesOnCloseAction()method where flag indicating the closing screen can be evaluated. AddControl: Adds a control to the UI manager.-
PreLoad: Can be used to load prefabs so that you can access sub components while constructing the GUI
Events
-
OnInit: Called once after the screen is created but before it is shown. This is the place to initialize any components or data. -
ConstructGUI: This is where you should load and set up your GUI. Here you should load your screen prefab and attach all your references. The ScreenBuilder Utility will do a great deal of this work for you. -
OnShow: Called every time the screen is shown to the user. Use this method to refresh data or update the UI. -
OnHide: Called every time the screen is hidden. This is used primarily in dialogs as they are often hidden and reused. This can be used for cleanup activities that are specific to the screen being hidden but not destroyed. -
OnClose: Invoked when the screen is closing. Note thatOnCloseis not called ifAutoDestroyis used(see the "pop" methods in Screen Manager ). For cleanup, consider usingOnDispose. -
OnUpdate: Functions similarly to the UnityUpdatemethod, called once per frame. Use this for regular updates such as checking for input or updating the UI. -
OnPause: Called when the update process is paused, typically because something else has gained focus or the application is transitioning to a different state. -
OnResume: Invoked when the paused update process resumes, indicating that the screen or application is back in focus. -
OnDispose: This is the final cleanup for the screen, called afterOnClose. Use this for thorough cleanup activities. -
OnFocusedGained: Called when the screen gains focus, useful for scenarios where multiple screens or components may be interacting. -
OnFocusedLost: Invoked when the screen loses focus, allowing for adjustments or pausing of activities that require focus. -
OnOneSecondUpdate: A built-in timer method that fires off once every second. Use this for activities that need to happen on a regular but non-frame rate dependent schedule.
Stat Screen Object API Details
Overview
StatScreenBase is an abstract class derived from
ScreenBase
so it will have all of the features of
ScreenBase plus the following:
Class: StatScreenBase
Fields
-
_DisplayCoins: Displays the number of coins. Automatically updates when the coin count changes. -
_DisplayGems: Displays the number of gems. Automatically updates when the gem count changes. -
_DisplayLives: Displays the number of lives. Automatically updates when the life count changes. -
_DisplayEnergy: Displays the amount of energy. Automatically updates when the energy level changes. -
_DisplayKeys: Displays the number of keys. Automatically updates when the key count changes. -
_DisplaySpins: Displays the number of spins. Automatically updates when the spin count changes. -
_DisplayStars: Displays the number of stars. Automatically updates when the star count changes. -
_DisplayTimeNextLife: Displays the time until the next life is earned. Updates every second when lives are below the maximum. -
_DisplayTimeNextEnergy: Displays the time until the next energy unit is earned. Updates every second when energy is below the maximum. -
_DisplayLivesOf: Displays the current number of lives in relation to the maximum (e.g., "5 / 6").
Usage
To use the
StatScreenBase
class, create a subclass that inherits from it. In the ConstructGUI() event assign a
TextMeshProUGUI
UI object from prefab to the respective stat types they should display. In the following example the
TextMeshProUGUI
UI object called "EnergyAmountText" will always display the current energy level while this screen is displayed.
_DisplayEnergy = _ScreenPrefab.GetTextMeshPro("EnergyAmountText");
}
Screen Manager API Details
Screens in the Freemium Starter Kit are stored in a FILO stack where the last screen added is always the current active screen. When you add (push) a new screen it will automatically become the current, active screen. When you remove (pop) the current screen the previous screen will automatically become active. The Screen Manager class which is referenced by _GlobalManager.Screen from inside a given screen will help you manage the UI. See the methods below for what options you have.
Methods
void CloseScreen()
Summary:
Closes the topmost screen on the stack. This method will cause the screens
OnClose
event to fire.
void PopAll()
Summary: Removes all screens from the stack.
-
Note: This will
AutoDestroythe screens, bypassing theOnCloseevent, butOnDisposewill still fire.
void PopScreen()
Summary: Removes the top screen from the stack.
-
Note: This will
AutoDestroythe screens, bypassing theOnCloseevent, butOnDisposewill still fire.
void PopScreens(int count)
Parameters:
count: The number of screens to remove from the stack.
Summary: Removes a given number of screens from the stack.
-
Note: This will
AutoDestroythe screen, bypassing theOnCloseevent, butOnDisposewill still fire.
void PopThisThenPushScreen(ScreenBase newscreen, string sceneName = "")
Parameters:
newscreen: New screen instance to push onto the stack.sceneName: (Optional) Name of the Unity scene to load.
Summary: Removes the top screen from the stack and replaces it with a new screen.
-
Note: This will
AutoDestroythe screens, bypassing theOnCloseevent, butOnDisposewill still fire.
void PopAllThenPushScreen(ScreenBase newscreen, string sceneName = "")
Parameters:
newscreen: New screen instance to push onto the stack.sceneName: (Optional) Name of the Unity scene to load.
Summary: Clears the stack and pushes a new screen onto it.
-
Note: This will
AutoDestroythe screens, bypassing theOnCloseevent, butOnDisposewill still fire.
void PushScreen(ScreenBase newscreen, string sceneName = "", bool hidePrevious = false)
Parameters:
newscreen: New screen instance to push onto the stack.sceneName: (Optional) Name of the Unity scene to load.hidePrevious: Whether to hide the previous screen instead of graying it out.
Summary: Pushes a new screen onto the stack.
void TimedFadeUIOnly(float duration, Color color, FadeType fadeType)
Parameters:
duration: Duration of the fade animation.color: Color to fade to.fadeType: Type of fade to use.
Summary: Performs a fade out and back without loading a new scene.
void HideAll()
Summary: Hides all visible screens.
void ShowAll()
Summary: Shows all previously visible screens.
void AddDialog(DialogBase dialog)
Summary: Adds a new dialog window to the dialog stack.
Parameters:
dialog: The new dialog instance to push onto the stack.
DialogBase GetDialog(string name)
Summary: Retrieves a specific dialog from the list.
Parameters:
name: The name of the dialog instance to find.
Returns: The
DialogBase
instance associated with the specified name. If no dialog with the given name is found, returns
null.
List<DialogBase> GetActiveDialogs()
Summary: Gets a list of all active dialogs.
Returns: A
List<DialogBase>
containing all active dialog instances. If there are no active dialogs, returns an empty list.
Game Manager
In addition to managing the screens you may also want to manage some aspects of the game. The Game Manager class which is referenced by _GlobalManager.Game from inside a given screen will help you manage the game. See the methods below for what options you have.
Methods
void ExitGame()
Summary: Closes all screens and exits the game.
void LoadUnityScene(string sceneName, float duration, Color color, FadeType fadeType)
Parameters:
sceneName: Name of the scene to load.duration: Duration of the fade animation.color: Color to fade to.fadeType: Type of fade to use.
Summary: Tells Unity to load a new scene with specified parameters.
void UnloadCurrentScene()
Summary: Tells Unity to remove the current scene.
Properties
string GameName { get; }
Summary: Gets the name of the game.
string GameDescription { get; }
Summary: Gets the description of the game.
Example Code Notes
API Stuff
One of the core features of The Freemium Starter Kit is how things are organized at runtime.
- At the very top level is the Game Controller called ExampleController.cs in this example. This object is setup for you during the One-Time Setup process and will be called FreemiumController by default, but you can rename it to whatever you like. This controller contains several events, that will fire automatically. These events are intended to help you load, setup and manage your game. See ExampleController.cs for an explanation of each event.
-
The next level down is the UI Screen Object. Each UI interface(menu, settings, level select, etc) should have its own screen there by isolating its code and events making the
whole thing much more manageable.
- See Screen Object and Stat Screen Object for documentation on coding a UI Screen Object
With multiple screens you will need to manage them and navigate back and forth between each one.
- See Screen Manager for documentation on managing the UI screen
The Code
This example project is intend to work as extensive documentation and sample code for building your own games using the Freemium Starter Kit. See below for an explanation of how things work and what you will encounter when looking at the source code.
Naming conventions and notes:
-
_FieldName: Fields that begin with an underscore are inherited system fields that are intended for direct use in your game. -
m_FieldName: Fields that begin with an m_ are private fields used in the game example. This is for readability, so you can easily distinguish them from inherited system fields and are in no way required for your game. -
MethodName: Methods that begin with an uppercase letter are system methods that are intended for direct use in your game. -
methodName: Methods that begin with a lowercase letter are part of the example code. This is again for readability so you can easily distinguish them from inherited system methods in the class. FSK: Freemium Starter Kit - This entire system.-
Consistency: Throughout this example I have tried to code things in different ways to show what all can be done. I am still on the fence about whether it was a good idea or not. -
Dummy Classes: Some things like the ad system and IAP do not work in the Unity Editor. So the system will automatically switch to a dummy class that will respond as if the system is present and working. Though usually without any kind of UI.
Communication
The FSK is not a typical Unity script. So you can't just drop it in the scene, get a reference to it, and call public methods. But don't worry there are many ways for Unity and Screens built in the FSK to communicate each other. Assets/RFI.Freemium/Example/Scripts/Screens/GameScreen.cs shows several examples of this:
- Getting a reference to the Unity script so that you can directly access public properties and methods. See Assets/RFI.Freemium/Example/Scripts/Screens/GameScreen.cs line 190. This is the usual Unity method to access another script, but it is only one way. So you still need a way for Unity Scripts to access the FSK screens
- Passing callback functions to the Unity script so that it can talk back to the FSK screen. See Assets/RFI.Freemium/Example/Scripts/Screens/GameScreen.cs line 192.
- Using the MessageManager(see below) to send messages back and forth
You can use one or all of them as you need.
MessageManager
The MessageManager will allow you to send and receive messages anywhere in Freemium Starter Kit or your game. See Assets/RFI.Freemium/Example/Scripts/ExampleController.cs starting around line 37 for examples of message handlers
To receive a message just setup a handler for the message you want.
MessageManager.AddObserver<CraftItemMessage>((message)=>{ message handling code here });
To send a message just call the SendMessage function and pass it the message object you want to trigger.
Quest Trigger
MessageManager.SendMessage(new QuestTriggerMessage { Trigger = TriggerType.TAG, Tag = "RollDoubles"});
Win Level
MessageManager.SendMessage(new LevelWonMessage { UniqueID = m_LevelId, Score = 0, Stars = m_Stars, Coins = m_CoinsBonus });
Lost Level
MessageManager.SendMessage(new LevelLostMessage { UniqueID = m_LevelId, HealthLost = m_HealthLoss });
List of message called by the system that you might want to watch for and react
List of message you may want to send
You can also send and catch custom messages. See
Assets/RFI.Freemium/Example/Scripts/ExampleController.cs
line 171 calls
MessageManager.SendMessage(new JewelUnlocked());
and
InventoryScreen.cs
the class constructor sets up and observer
MessageManager.AddObserver<JewelUnlocked>(jewelUnlockHandler);
Quest Trigger
Not every quest can be automatically tracked by the system, many are, but not all. For example the quest system has no way of knowing what UI the user has opened. Therefor you as the developer will need to tell the system that the event happened. For an example check the OnShow events in Assets/RFI.Freemium/Example/Scripts/Screens/ShopScreen.cs or Assets/RFI.Freemium/Example/Scripts/Screens/SpinGameScreen.cs Another great example the is Roll Doubles question. Which is track in the RollComplete function in Assets/RFI.Freemium/Example/Scripts/Game/DungeonRoomController.cs
Multiple quests can track the same event. If quest A and quest B are both tracking the same event, but you dont want quest B to start tracking until after quest A is completed Then simply lock quest B and set it to be unlocked by quest A. Now when quest A finishes, quest B will automatically be unlocked and it will start tacking. There is no limit on the chains you can create like this.
Coroutine
Coroutine are a function of MonoBehaviour, and the screens within the FSK are not based on MonoBehaviour so to you use a coroutine you simply have to do the following
The only real difference is that inside an FSK Screen you have to call
_GlobalManager.Async.StartCoroutine instead of just
StartCoroutine
. For a full working example see
Assets/RFI.Freemium/Example/Scripts/Screens/VictoryScreen.cs
Unity Animations
For example using Unity Animator inside UI system see Assets/RFI.Freemium/Example/Scripts/Screens/QuestScreen.cs
FAQ
- 1. What license is the software released under?
- 2. Can I reuse the art work or code from the example game?
- 3. Have there been any games released using the Freemium Starter Kit?
- 4. What happened Chartboost? Why is it disabled in the editor?
- 5. What happened AdColony? Why is it no longer available?
- 6. What are the URLs for the various optional plugins that the Freemium Starter Kit uses?
- 7. How do I upload my game to the App Store?
- 7. Is the URP (Universal Render Pipeline) supported?
- 8. Is the Freemium Starter Kit for 2D or 3D games?
- 9. How do I use The Event Tracker?
- 10. How do I create the animated UI windows like I see in the demo?
- 11. How do I create bonus rewards for watching ads?
- 12. Does the Freemium Starter Kit work for desktop games on Mac or Windows?
- 13. How can I contact support or find additional help?
What license is the software released under?
Answer:
The example code/game included in this package, The Enchanted Forest, is licensed under the MIT License. For more details, see the LICENSE and LICENSE-FOR-EXAMPLE-CODE files included in the package.
Can I reuse the art work or code from the example game?
Answer:
Plain English: You are free to use, modify, and distribute the example game (The Enchanted Forest), even for commercial purposes, as long as you include the original copyright notice.
Have there been any games released using the Freemium Starter Kit
Answer:
Yes!Halloween Simon [Android] [iOS]
Halloween Memory [Android] [iOS]
What happened Chartboost? Why is it disabled in the editor
Answer:
In 2023 Chartboost redid their SDK and introduced a lot of breaking changes. I have simply not had time to implement and test the new SDK.What happened AdColony? Why is it no longer available?
Answer:
At some point in the last couple of years AdColony discontinued their Unity SDK. You can still find clones of it on GitHub, bit I have not found one that is still maintained. I think it is still possible to get AdColony to work using the Android and iOS SDKs, but I am not sure. I am working to replace AdColony with AppLovin in the next release.What are the URLs for the various optional plugins that the Freemium Starter Kit uses?
Answer:
- Google Play: https://github.com/google/play-unity-plugins
- Google Play Games: https://github.com/playgameservices/play-games-plugin-for-unity
- Google Play In App Review: https://github.com/google/play-unity-plugins
- Facebook SDK: https://github.com/facebook/facebook-sdk-for-unity
- Chartboost: https://answers.chartboost.com/en-us/articles/download
- AdMob: https://developers.google.com/admob/unity/quick-start
How do I upload my game to the App Store?
Answer:
This not specific to the Freemium Starter Kit, but it is not straight forward or intuitive. I hope this helps.iOS Upload
If the project is all set up properly, then simply make sure your Schemes in Xcode are all properly set to "release".
Then archive your app in Xcode through
Product -> Archive on the top bar.
Once that finishes, it should automatically open the Xcode Organizer window (if not, open it through
Window -> Organizer).
In the Archives tab, select your latest archive and click
Upload to App Store...
and that'll perform some sanity checks and upload it to iTunes Connect.
Once that happens, follow the instructions on that App Submission Guide above.
Is the URP (Universal Render Pipeline) Supported?
Answer:
Yes! However it is not configured by default. Please watch this video for step by step instructions on how to configure The Freemium Starter Kit for URPIs the Freemium Starter Kit for 2D or 3D games?
Answer:
Both! While the UI Manager and ScreenBuilder are primarily 2D because they handle the user interface, the Freemium Starter Kit itself is versatile and supports both 2D and 3D games. The included example game, The Enchanted Forest, showcases this versatility by featuring both 2D and 3D elements. For instance, the dice and game board are 3D objects within a 3D environment. Currently, there are two released games built on the Freemium Starter Kit, and both are primarily 2D.How do I use The Event Tracker?
Answer:
The Event Tracker allows you to monitor and respond to a wide range of data. The system automatically generates a notification for events such as the number of times the game has been played, total gameplay duration, days since the first play, days since the last play, or specific dates like Halloween. Please watch this video for step by step instructions on how to configure The Event Tracker.How do I create the animated UI windows like I see in the demo?
Answer:
In the video below we demonstrate how to recreate some of the impressive UI visual effects featured in the Freemium Starter Kit demos. This guide will also showcase the UI Manager's capabilities in handling the opening, stacking, and closing of UI windows.How do I create bonus rewards for watching ads?
Answer:
In the video below, we demonstrate how to create and grant rewards using the Freemium Starter Kit, including how to give players the option to increase their rewards by watching ads.Does the Freemium Starter Kit work for desktop games on Mac or Windows?
Answer:
Parts of the system will work, but not all. The Ads, IAP, Leaderboards, In-App Reviews, Notification, and Social Media sharing will not work. However because of the modular nature of the system, as long as you do not turn on the features you shouldn't have any issue.How can I contact support or find additional help?
Answer:
Join our Discord ServerSend Support an email
Social Networks
Common Errors or Problems
- 1. When I run the example game in the editor all the text is missing
- 2. When I run the example game in the editor it looks terrible
- 3. I installed the In App Purchases service package the Analytics service package now I am getting this error
- 4. Using Unity 2018 and Lower: Legacy Build System Error on Xcode
- 5. When building on iOS I get the following error
- 6. I installed the SDK/Package like it says but I am still getting compiler errors or it just does not work.
- 7. After switching to Android build I get this windows popping up
- 8. The Android dependence resolver ended with an error. Why did you tell me to do this?
- 9. Getting errors in the Unity Console but everything still seems to work
- 10. Googles Version Handler wants to delete obsolete files from my project
- 11. When testing on Android devices I get the following error
- 12. How do I upload my game to the App Store?
- 13. I have a conflict between Admob and Facebook SDK
- 14. Where can I find my Facebook Page ID?
- 15. I can't build the project to Android, it says "Android resource linking failed: unexpected element found in manifest" in the error message
- 16. Can't share, it says "java.lang.ClassNotFoundException: com.yasirkula.unity.NativeShare" in Logcat
- 17. iOS framework addition failed due to a CocoaPods
- 18. Unity iOS project 'FBSDKShareKit/FBSDKShareKit.h' file not found
- 19. Build iOS failed: Undefined symbols for architecture
- 20. The Google Mobile Ads SDK was initialized without AppMeasurement
- 21. SerializedObjectNotCreatableException.
- 22. Getting a "certificate is not trusted" error for iOS Distribution Certificate
- 23. When I try to test IAP I get errors
- 24. When I run the example game the background is all black or fuchsia
- 25. I closed Unity with the Freemium Demo Editor open, but when I opened Unity again it was showing the actual editor
- 26. There are 2 event systems in the scene. Please ensure there is always exactly one event system in the scene
When I run the example game in the editor all the text is missing
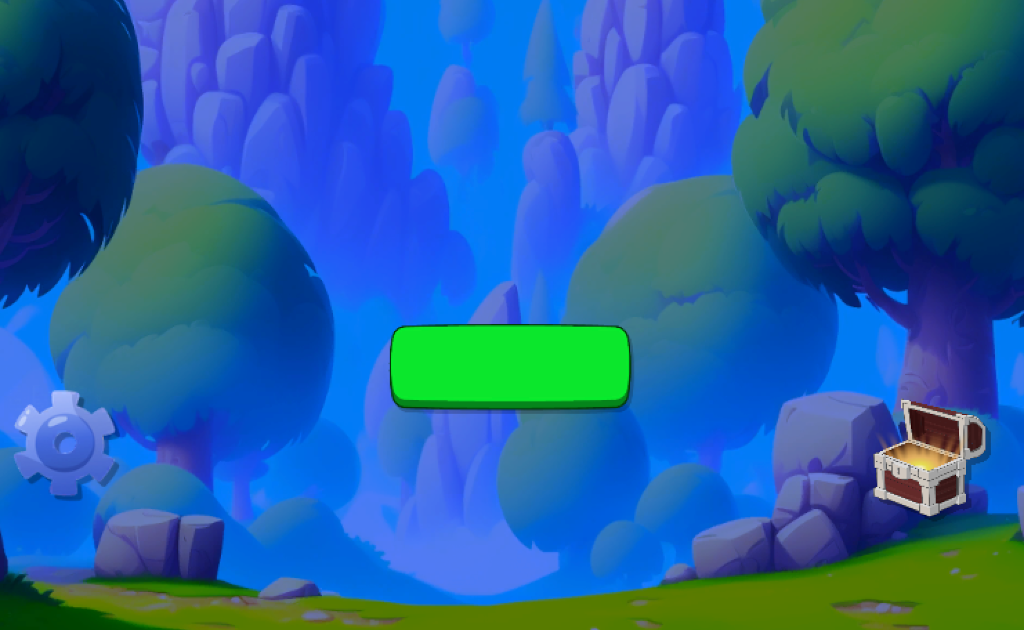
Solution:
You need to install the Text Meshpro Plugin. There should be a window open asking you to install it.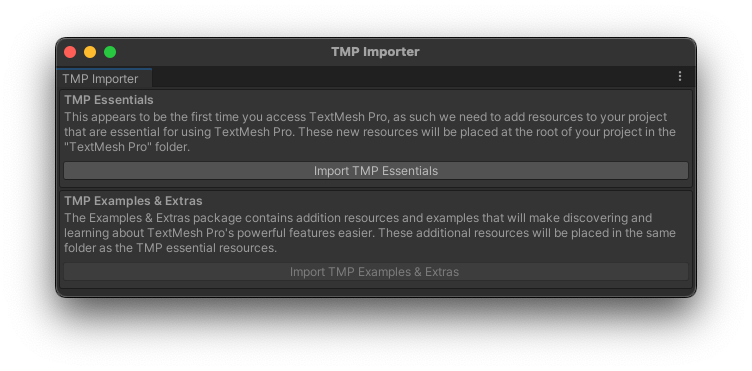
Otherwise click
Window > TextMeshPro > Import TMP Essential Resources
When I run the example game in the editor it looks terrible
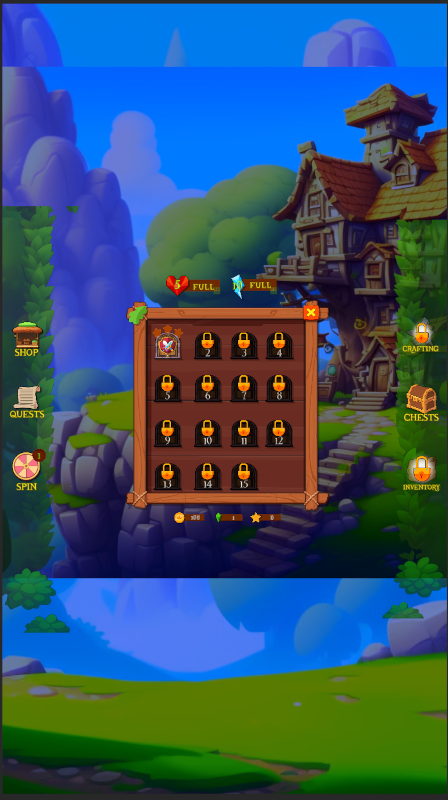
Solution:
The game is designed to run on a phone in landscape mode. Please set your game view resolution to one of the following:
- 16:9 landscape
- 1920x1080 landscape
I installed the In App Purchases service package the Analytics service package now I am getting this error:
Library/PackageCache/com.unity.services.core@1.10.1/Runtime/Telemetry/Handlers/MetricsHandler.cs(21,13): error CS0103: The name 'AotHelper' does not exist in the current context
Solution:
Both of those packages use a specific(ie older) version of Newtonsoft.Json.dll . Unity removed it from the package manager but still uses it in some of their own packages. To make life easier the Freemium Starter Kit also includes a copy of Newtonsoft. You may safely delete Assets/RFI.Freemium/Scripts/Plugins/NewtonSoft/Newtonsoft.Json.dll from the project. After that allow Unity to recompile and everything will be fine.I installed the SDK/Package like it says but I am still getting compiler errors or it just does not work.
Solution:
It is possible that the owner of the SDK/Package has made breaking changes. Here are the versions of each SDK/Package that we know for sure work with the Freemium Starter Kit. If you have a newer version, please revert to the version listed below until an update to the Freemium Starter Kit is released.- Google Play Games: Version 0.10.12
- Google Play In App Review: Version 1.8.1
- Facebook SDK: Version 17.0.1
- Chartboost: Version 8.1.0
- AdMob: Version 9.10
- TextMeshPro: Version 3.0.6
- Mobile Notifications: Version 2.2.1
- In App Purchasing: Version 4.9.4
- Unity Ads: Version 4.4.2
- iOS 14 Advertising Support: Version 1.0.0
After switching to Android build I get this windows poping up
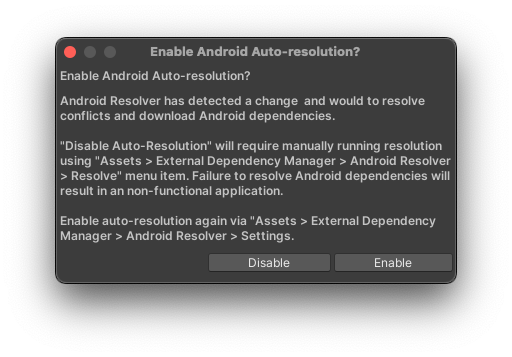
Solution:
Google's Android dependance resolver has detected an error and is attempting to resolve the issue. I suggest you turn it on by clicking the Enable button.The Android dependance resolver ended with an error. Why did you tell me to do this?
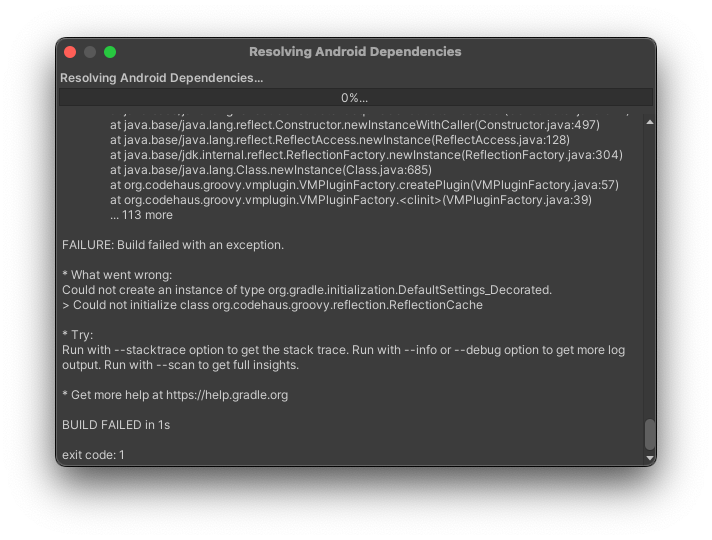
Solution:
Sorry. Occasionally, you may encounter the need for debugging. The Freemium Starter Kit integrates multiple large and intricate systems. Unfortunately, conflicts between these systems can arise, leading to issues. This FAQ aims to address known conflicts, but if you encounter any others, please don't hesitate to reach out. I'm here to assist you in resolving them.Getting errors in the Unity Console but everything still seems to work
The stack trace includes something like:
UnityEditor.EditorApplication:Internal_CallUpdateFunctions () (at /Users/bokken/build/output/unity/unity/Editor/Mono/EditorApplication.cs:362)
Solution:
Look at the stack trace. If the error in the Unity Console includes this path in the stack trace/Users/bokken/build/
the error is coming from inside Unity.
Googles Version Handler wants to delete obsolete files form my project
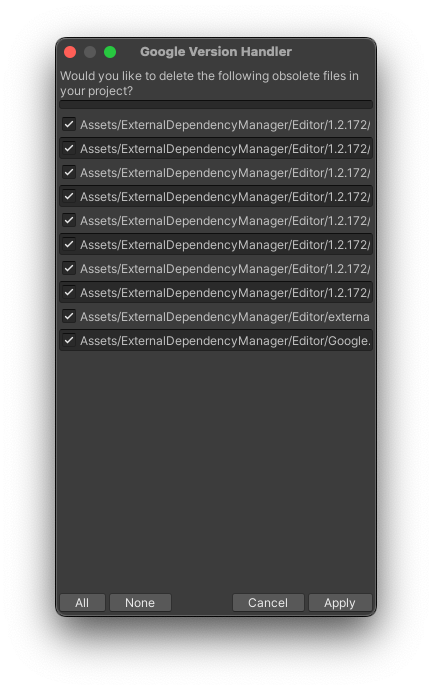
Solution:
I always have said yes and never had an issue. Usually it makes some errors or warnings in the console go away.When testing on Android devices I get the following error:
Error Unity AndroidJavaException: java.lang.NoSuchMethodError: no non-static method with name='registerNotificationChannel'
signature='(Ljava/lang/String;Ljava/lang/String;ILjava/lang/String;ZZZZ[II)V' in class Ljava.lang.Object;
Error Unity java.lang.NoSuchMethodError: no non-static method with name='registerNotificationChannel'
signature='(Ljava/lang/String;Ljava/lang/String;ILjava/lang/String;ZZZZ[II)V' in class Ljava.lang.Object;
9216 9252 Error Unity at com.unity3d.player.ReflectionHelper.getMethodID(Unknown Source:167)
9216 9252 Error Unity at com.unity3d.player.UnityPlayer.nativeRender(Native Method)
9216 9252 Error Unity at com.unity3d.player.UnityPlayer.access$300(Unknown Source:0)
9216 9252 Error Unity at com.unity3d.player.UnityPlayer$e$1.handleMessage(Unknown Source:95)
9216 9252 Error Unity at android.os.Handler.dispatchMessage(Handler.java:102)
9216 9252 Error Unity at android.os.Looper.loop(Looper.java:214)
9216 9252 Error Unity at com.unity3d.player.UnityPlayer$e.run(Unknown Source:20)
9216 9252 Error Unity at UnityEngine._AndroidJNIHelper.GetMethodID (System.IntPtr jclass, System.String methodName, System.String signature, System.Boolean isStatic) [0x0003c] in
4d1b0fc064fc4626a
Solution:
Unity Package Manager update Mobile Notifications package to at least v1.3.2I have a conflict between Admob and Facebook SDK
Found conflicting Android library gpgs-plugin-support
Assets/Plugins/Android/gpgs-plugin-support-0.9.42 (managed by the Android Resolver) conflicts with:
Assets/GooglePlayGames/Editor/m2repository/com/google/games/gpgs-plugin-support/0.9.42/gpgs-plugin-support-0.9.42.aar
Your application is unlikely to build in the current state.
To resolve this problem you can try one of the following:
* Updating the dependencies managed by the Android Resolver to remove references to old libraries. Be careful to not include conflicting versions of Google Play services.
* Contacting the plugin vendor(s) with conflicting dependencies and asking them to update their plugin.
Solution:
This was a problem in older versions of the Facebook SDK and should be resolved by simply making sure you have the latest Facebook and Google Play SDK.Otherwise after importing the package, you can resolve client jars in the Unity Editor menu bar, under Assets > Play Services Resolver > Android Resolve
Where can I find my Facebook Page ID?
Solution:
- From the News Feed, click Pages in the left side menu.
- Click your Page name to go to your Page.
- Click About at the top of your Page. If you don't see it, click More.
- Scroll down to find your Page ID below MORE INFO.
I can't build the project to Android, it says "Android resource linking failed: unexpected element <queries> found in <manifest>" in the error message
Solution:
NativeShare adds <queries> element to AndroidManifest.xml due to the new package visibility change. The build error can be fixed by following these steps: https://developers.google.com/ar/develop/unity/android-11-build (in my tests, changing "Gradle installed with Unity" wasn't necessary). In the worst case, if you are OK with NativeShare not working on some of the affected devices, then you can open NativeShare.aar with WinRAR or 7-Zip and then remove the <queries>...</queries> element from AndroidManifest.xml.Can't share, it says "java.lang.ClassNotFoundException: com.yasirkula.unity.NativeShare" in Logcat
Solution:
If you are sure that your plugin is up-to-date, then enable Custom Proguard File option from Player Settings and add the following line to that file:-keep class com.yasirkula.unity.* { *; }
This project uses AndroidX dependencies, but the 'android.useAndroidX' property is not enabled. Set this property to true in the gradle.properties file and retry.
The following AndroidX dependencies are detected: androidx.core:core:1.3.2, androidx.appcompat:appcompat:1.1.0, androidx.slidingpanelayout:slidingpanelayout:1.0.0, a

And maybe add
android.useAndroidX=true
if not there already.
iOS framework addition failed due to a CocoaPods
iOS framework addition failed due to a CocoaPods installation failure. This will likely result in a non-functional Xcode project.
Solution:
From the terminal try:$ pod repo update
$ pod install
$ pod setup
If it still fails, this may be due to a broken CocoaPods installation. See:
First try: https://guides.cocoapods.org/using/troubleshooting.html for potential solutions.
$ gem uninstall cocoapods
$ gem install cocoapods
Then check:
https://forum.unity.com/threads/ios-framework-addition-failed-due-to-a-cocoapods-installation-failure.483511/
Also try iOS Resolver in Play Services Resolver > iOS Resolver

Unity iOS project 'FBSDKShareKit/FBSDKShareKit.h' file not found
Solution:
https://forum.unity.com/threads/unity-ios-project-fbsdksharekit-fbsdksharekit-h-file-not-found.803502/Build iOS failed: Undefined symbols for architecture arm64: "_GADURequestInterstitial"
Solution:
https://github.com/googleads/googleads-mobile-unity/issues/1616The Google Mobile Ads SDK was initialized without AppMeasurement.

Solution:
https://stackoverflow.com/questions/58195946/google-admob-initialized-without-an-application-id-errorhttps://stackoverflow.com/questions/66411662/the-google-mobile-ads-sdk-was-initialized-without-appmeasurement
Search for Info.plist on your project and add parameter named GADIsAdManagerApp. It should be Boolean and set it to YES.
SerializedObjectNotCreatableException
SerializedObjectNotCreatableException: Object at index 0 is null
UnityEditor.Editor.CreateSerializedObject () (at /Users/bokken/build/output/unity/unity/Editor/Mono/Inspector/Editor.cs:694)
UnityEditor.Editor.GetSerializedObjectInternal () (at /Users/bokken/build/output/unity/unity/Editor/Mono/Inspector/Editor.cs:667)
UnityEditor.Editor.get_serializedObject () (at /Users/bokken/build/output/unity/unity/Editor/Mono/Inspector/Editor.cs:564)
UnityEditor.RectTransformEditor.OnEnable () (at /Users/bokken/build/output/unity/unity/Editor/Mono/Inspector/RectTransformEditor.cs:103)
Solution:
This is an error inside Unity. You can tell because "/Users/bokken/build" is the path and user of the internal Unity build server. It seems to happen most often when you have multiple editor windows or multiple Inspectors open. In this case, the Freemium Editor counts as an editor window. It only happens when you are using the main Unity Editor. So you do not have to worry about it in your final build. This error will not cause any problems, but it can be annoying as it spams the log with messages.See the following resources for potential sort term solutions:
https://forum.unity.com/threads/solved-unity-window-argumentexception-object-at-index-0-is-null.697784/
https://stackoverflow.com/questions/72649599/why-getting-errors-serializedobjectnotcreatableexception-object-at-index-0-is-n
Getting a "certificate is not trusted" error for iOS Distribution Certificate
Solution:
Apple has updated Developer Relations Intermediate Certificate. Just download the certificate from here and install it. If it doesn't work, have a look at https://developer.apple.com/support/expiration/ .When I try to test IAP I get the following
UnityIAP: No App Receipt found
OnInitializeFailed InitializationFailureReason:NoProductsAvailable
Solution:
For the IAP to work, all you need to do is release and publish the game in the Apple's App Store, and download the app from the App Store directly!It is also worthwhile mentioning that we need to fill in the forms at Agreements, Tax, and Banking. Otherwise the initialization process won't even pass.
How do I upload my game to the App Store?
Solution:
This not specific to the Freemium Starter Kit, but it is not straight forward or intuitive. I hope this helps.
iOS UploadIf the project is all set up properly, then simply make sure your Schemes in Xcode are all properly set to "release".
Then archive your app in Xcode through
Product -> Archive on the top bar.
Once that finishes, it should automatically open the Xcode Organizer window (if not, open it through
Window -> Organizer).
In the Archives tab, select your latest archive and click
Upload to App Store...
and that'll perform some sanity checks and upload it to iTunes Connect.
Once that happens, follow the instructions on that App Submission Guide above.
Using Unity 2018 and Lower: Legacy Build System Error on Xcode
When exporting the project to Xcode, you may encounter a build error saying:
"The Legacy Build System will be removed in a future release. You can configure the selected build system and this deprecation message in File > Project Settings"
Solution:
- Navigate to File, then select Project Settings
- Under Shared Project Settings, change the Build System settings to New Build System
- Click 'Done' and rebuild your project.
When building on iOS I get the following error
The type or namespace name 'Advertisement' does not exist in the namespace 'Unity' (are you missing an assembly reference)
Solution:
Install iOS 14 Advertising Support Package or newer.When I run the example game the background is all black or fuchsia
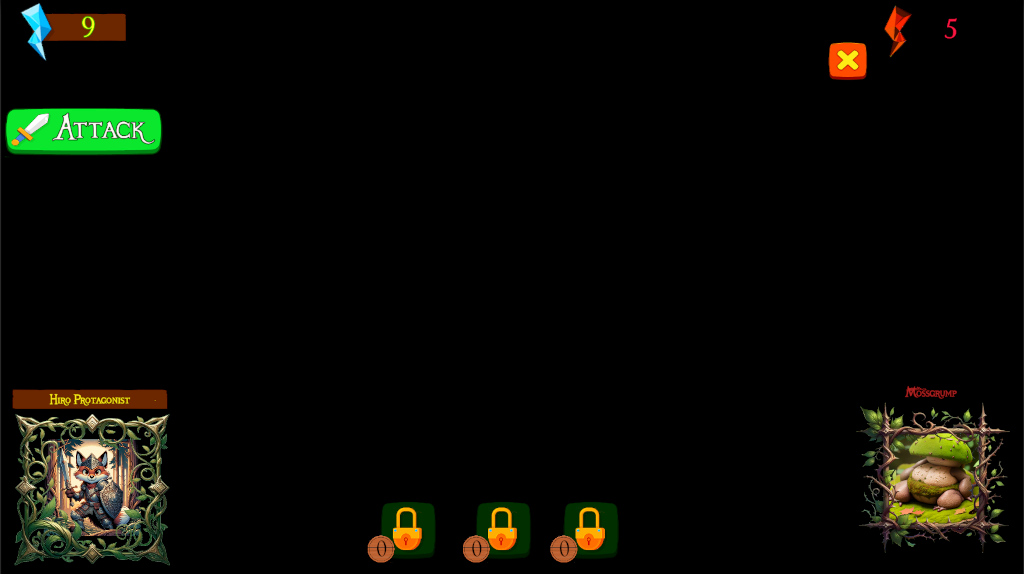
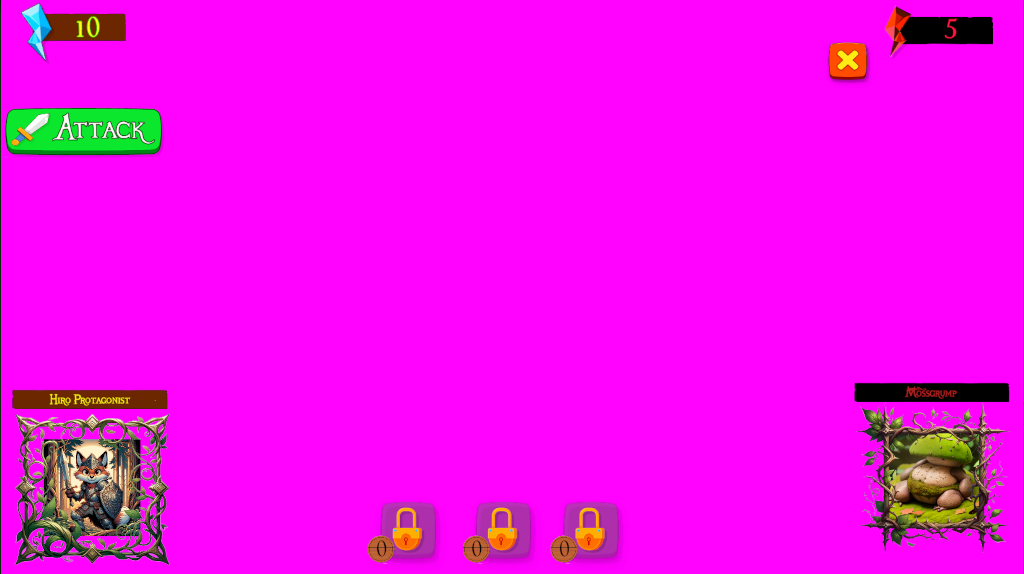
Solution:
If you are using URP that could be the issue. URP is supported however it is not configured by default. Please watch this video for step by step instructions on how to configure The Freemium Starter Kit for URPI closed Unity with the Freemium Demo Editor open, but when I opened Unity again it was showing the non-demo editor
Solution:
Sorry, there is only one editor. When you open the editor from the menu, it passes in switches to tell it which dataset to use. If it does not get those switches, it defaults to the main editor. Please close the editor and open it again from the menu.There are 2 event systems in the scene. Please ensure there is always exactly one event system in the scene
Solution:
By default, the Freemium Starter Kit creates its own instance of the EventSystem object. If you create UI objects like buttons or texts directly in the scene rather than following the FSK convention of putting them into prefabs, then Unity will automatically add an EventSystem object to the scene, which causes the issue. There are two simple solutions:1. Simply delete the EventSystem from the scene, but note it will come back if you create more UI objects.
2. If you want to use the EventSystem object in the scene, you need to tell the FSK to use it by tagging the EventSystem object as "CustomInputEvent." This tag has already been created; you just need to select it.
Game Settings
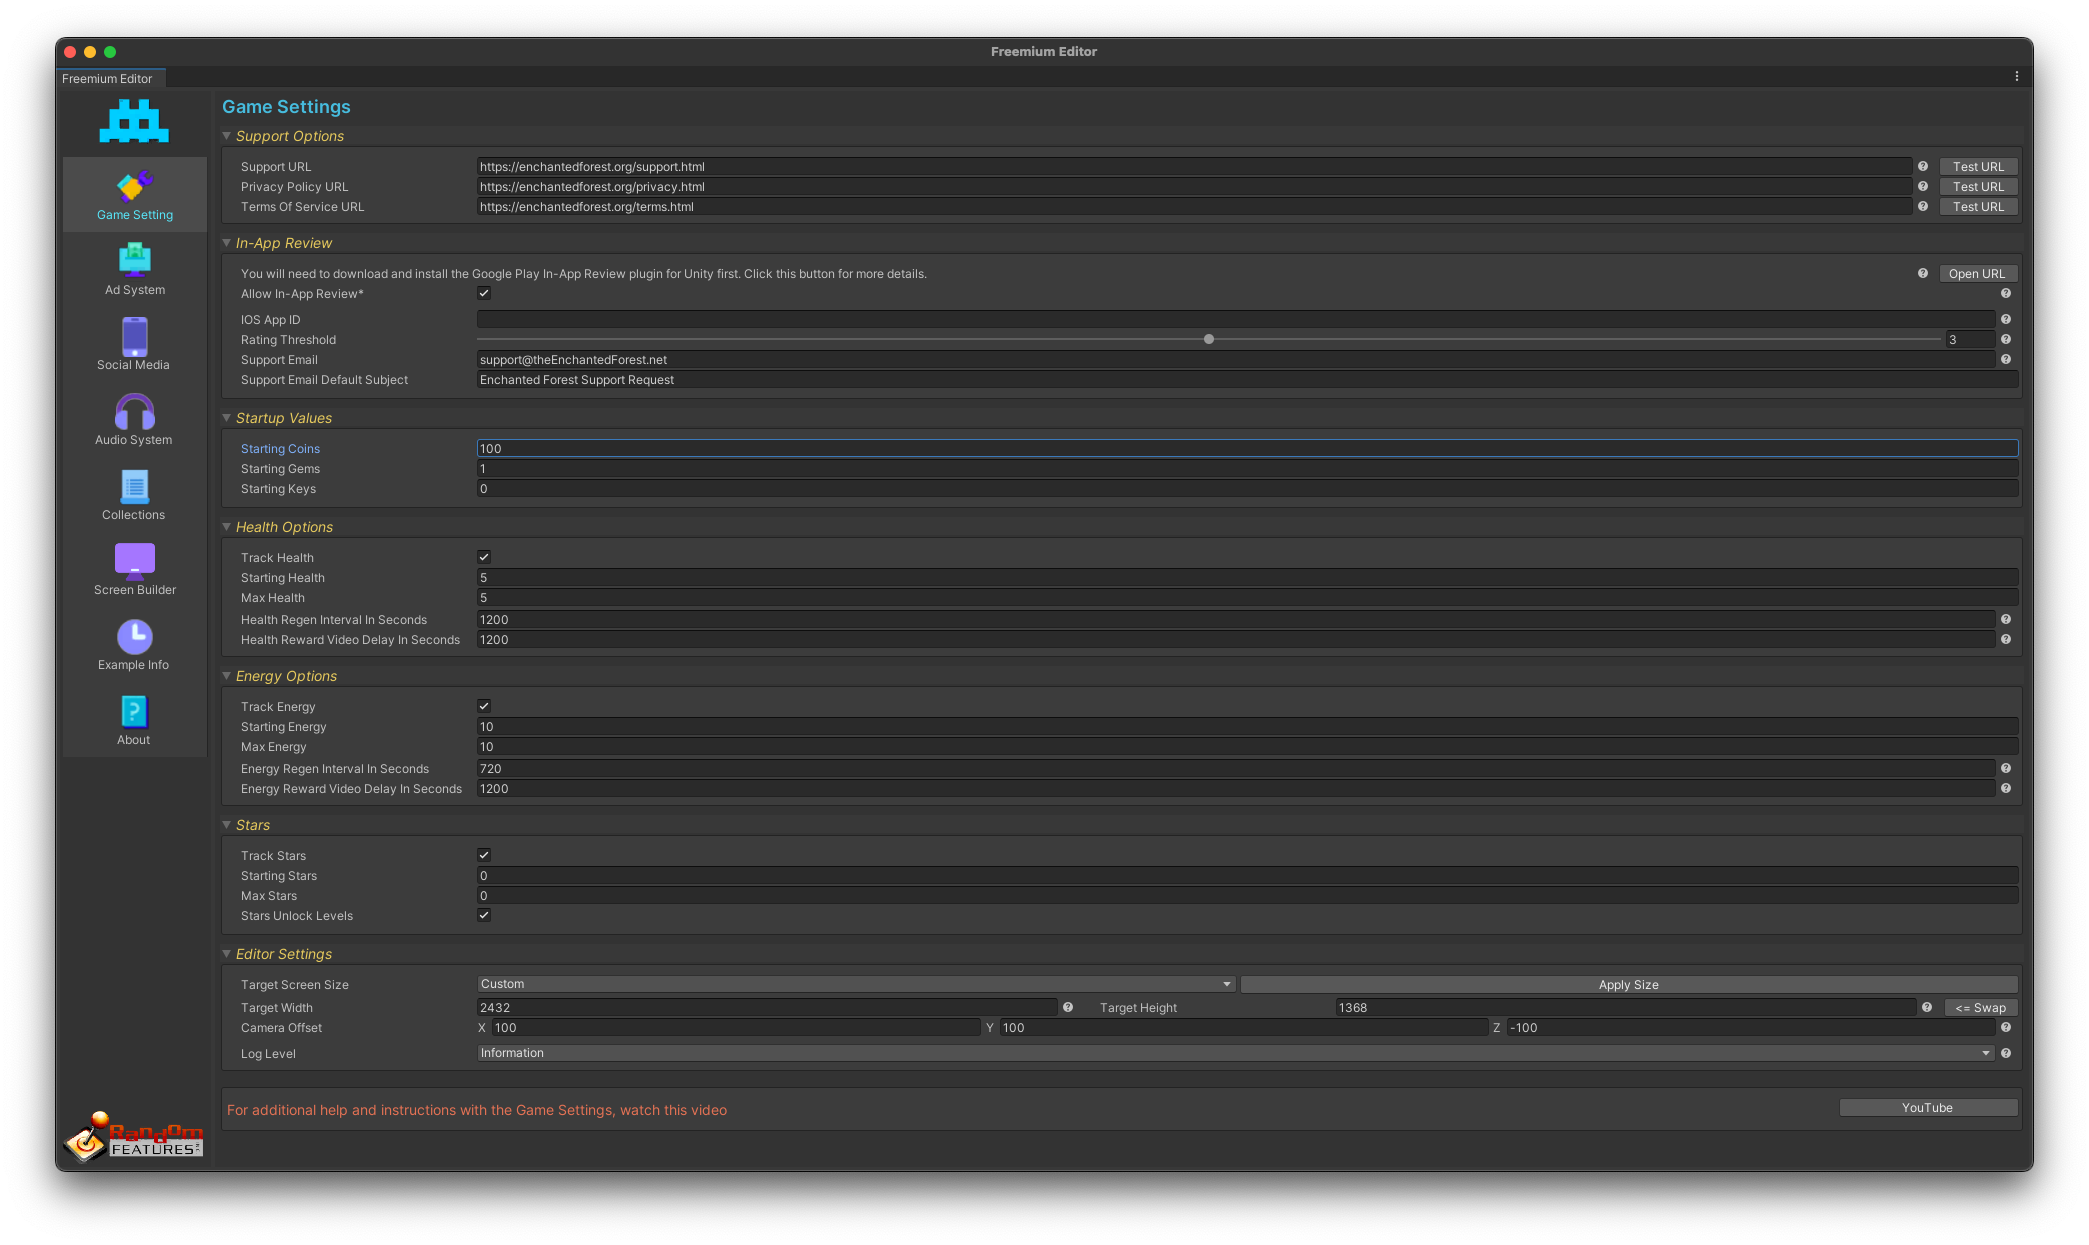
Support Options

These fields are optional and help link to external support from within your game. Google and Apple require a Privacy Policy and Support URL on app pages. These must be set up regardless.
In-App Review

Using In-App Review will allow you to open a platform-specific review dialog for your game. What I usually do is ask the player what they intend to rate the app. If they say 3 stars or less, I open a pre-filled support email. If you want to change the required minimum rating, the Rating Threshold slider will allow you to set the number of stars required to get the email popup. The Freemium Starter Kit will do all this for you with one API call. Note: To use this feature, you must download and install the Google Play In-App Review plugin for Unity. If you turn on the Allow In-App Review checkbox without installing the plugin, you will get compile errors.
Startup Values

Here you have the option to give the player coins, gems, or keys right from the start.
Health Options

This manages the player's health. In the game, you can call it health, life, hearts, or whatever suits your needs, but in the API it is called Health. If you choose to track health, then used in combination with other settings, you can automatically subtract from a player’s health when they fail a level and prevent them from playing when they have no health left. Health can automatically regenerate over time and you can easily modify the Max Health and Regeneration rates with inventory items. Consumable inventory items can refill or drain Health as you desire.
Energy Options

This manages the player’s energy much like the Health Options above. If you are only using one of the two, you are free to choose between life and energy as they are pretty much the same. I use both. I use Health to control the player’s moving on to new levels before they are ready. I use Energy as a cost for replaying previous levels. Mostly just to control farming and to give the player another stat to manage. Like Health, Energy can automatically regenerate over time and you can easily modify the Max Energy and Regeneration rates with inventory items. Consumable inventory items can refill or drain Energy as you desire.
Stars

Stars can track a player's progress. They are awarded for completing a level. Additionally, during level creation, you can specify how many stars are required for players to access a level. This allows for customizable progression through the game.
Editor Settings

These settings are only for game development and do not impact gameplay. The "Target Width and Height" option informs the editor of the screen resolution for which your UI graphics are designed. When using the Screen Builder, you'll see a purple box that outlines the targeted screen area before scaling. Ensuring your UI elements stay within this purple box guarantees visibility across all device resolutions. In the game, the UI is first rendered to a UI Camera and then overlaid onto the main camera. This UI Camera is visible within the scene editor while the game is running. If you need to adjust the scene while the game is active, you can use the "Camera Offset" to reposition the UI Camera. I typically do this to keep it out of the way.
Ad System
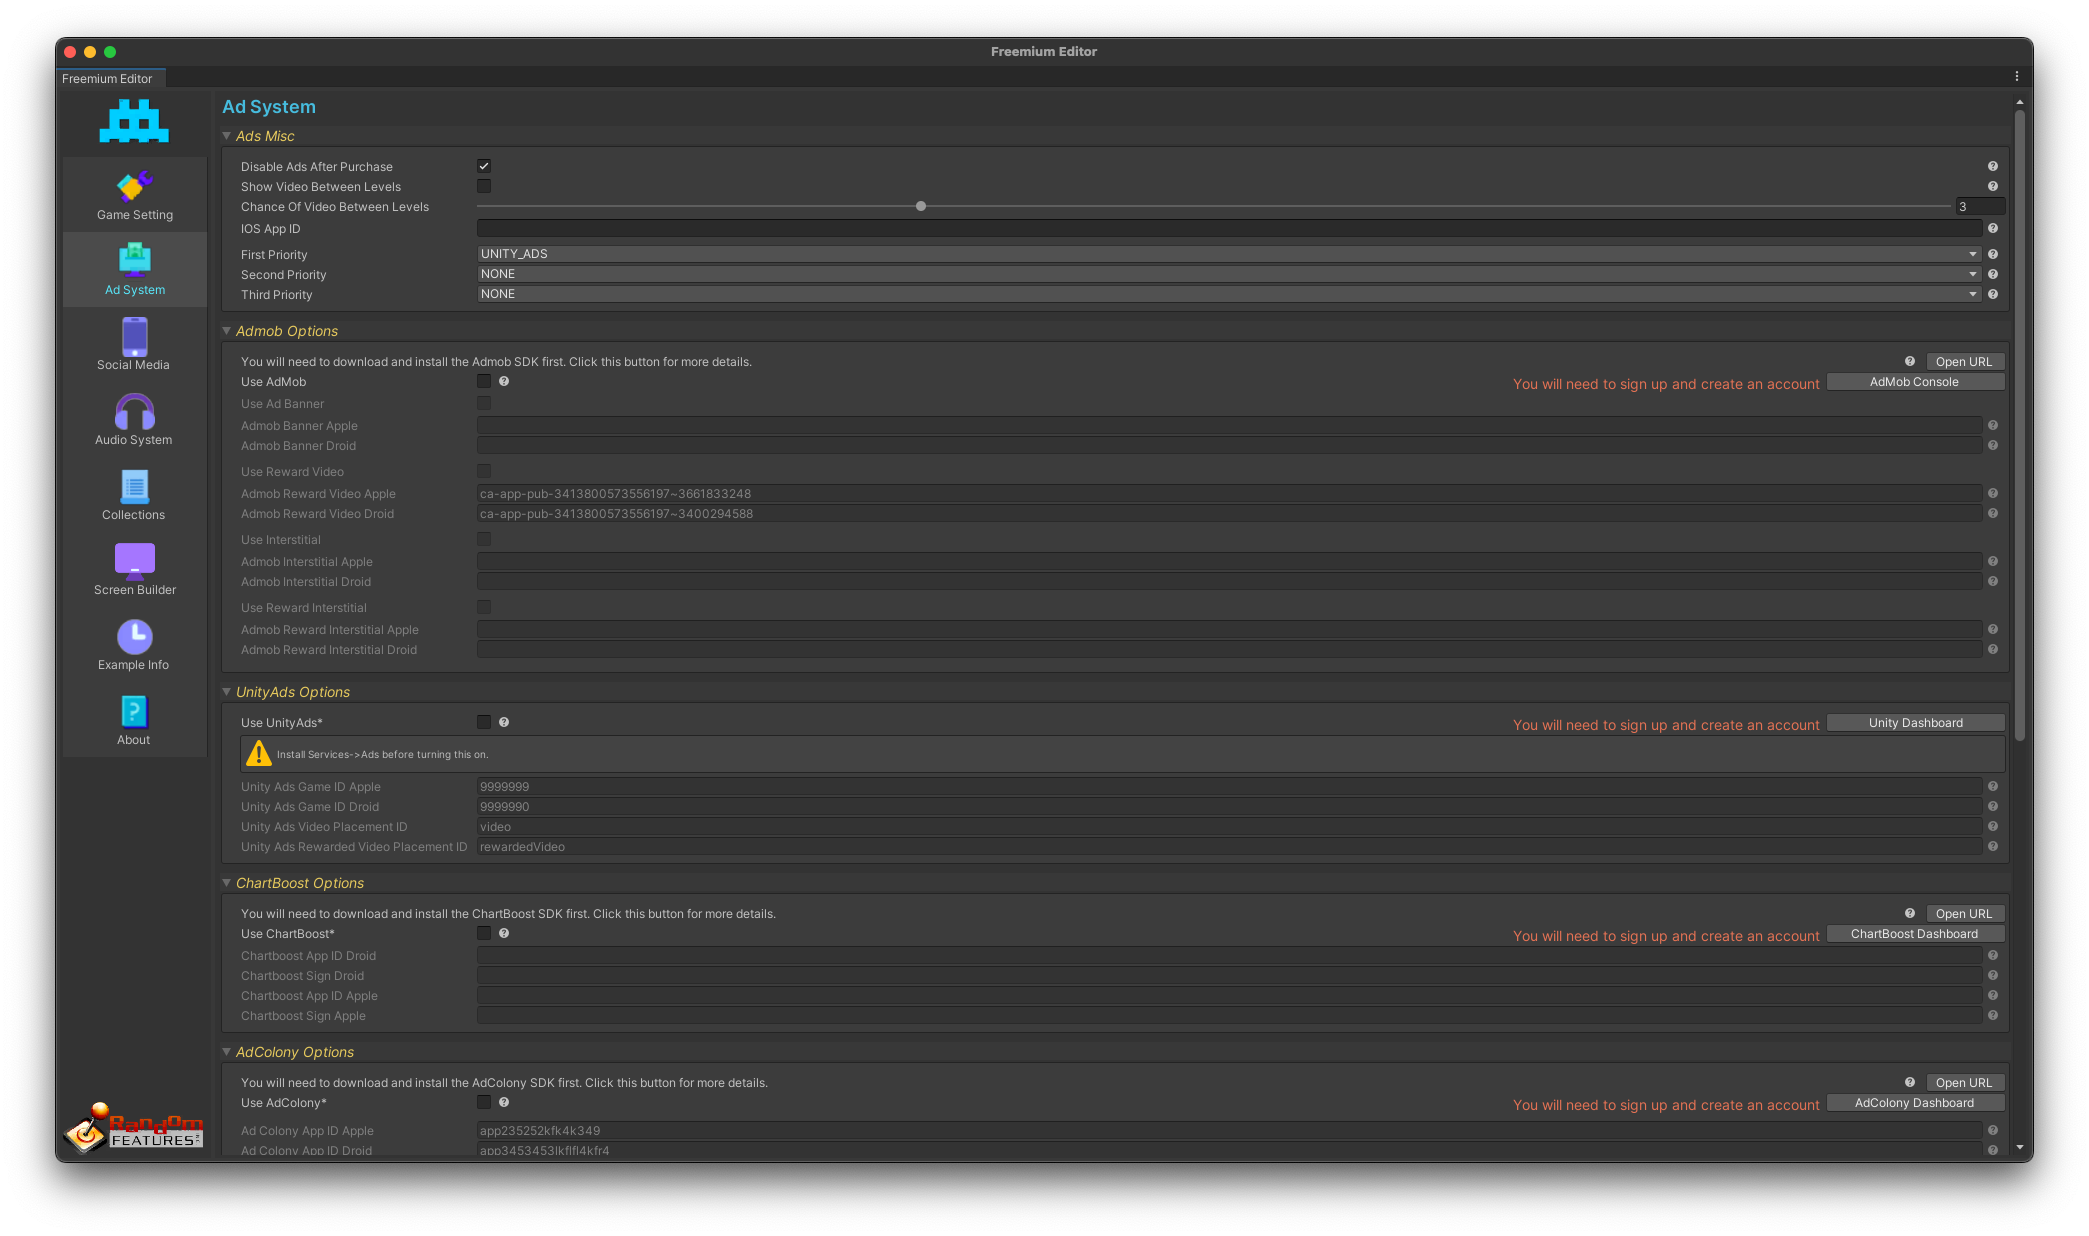
Ads Misc

This section is relevant if you are displaying ads, regardless of the ad network you choose. The "Disable Ads After Purchase" option does exactly what it states: if a player makes a purchase through the in-app purchase (IAP) system, all automatic ads (e.g., ads between levels) will be disabled. If you prefer to show ads between levels but not too frequently—just occasionally to generate revenue without overwhelming your players—you can adjust the "Chance of Videos Between Levels" to increase or decrease their frequency. If you're using multiple ad networks, you can prioritize the top three. This means if the first network fails to deliver an ad, the system will automatically query the second, and if necessary, the third. In the U.S., networks like AdMob or UnityAds typically always return an ad, but this may not be the case outside the U.S., especially with targeted ads. If you set up multiple ad networks within the Freemium Starter Kit, they are managed through a unified API. For instance, when you request to show an interstitial ad, the system will check all your configured ad networks in the order of priority to find the first one that can deliver the ad. Keep in mind that not all ad networks support every type of ad. The Freemium Starter Kit will strive to fulfill your ad requests based on the capabilities of your chosen ad networks and their set priorities.
Admob Options

If you've decided to use AdMob, your first step is to download and install the SDK. Trying to enable AdMob in the editor without installing the SDK first will lead to compiler errors. Use the "Open URL" button to access the AdMob website and download the necessary files. Next, you'll need to sign up for an AdMob account. Once your account is set up, you can configure the Freemium Starter Kit with the types of ads you plan to use in your game. If you choose Reward Video or Reward Interstitial, these will be integrated into the built-in reward system automatically. If you set up regular Interstitial ads, they will automatically display between levels if you've activated this feature. Ad banners, however, must be triggered manually using a simple API call and can appear on any screen that inherits from ScreenBase. For guidance on implementing this, please refer to the example game provided.
UnityAds

If you've opted to use UnityAds, your first step is to create an account. After signing up, you'll need to activate the Ads service. Go to the Services tab, select Ads, and turn on UnityAds. Remember, enabling UnityAds in the editor without first installing the UnityAds package will lead to compiler errors. To proceed, use the "Unity Dashboard" button to navigate to the UnityAds website where you can sign up for a UnityAds account. UnityAds requires separate ad IDs for Apple and Android devices. Once these are set up in the dashboard, you'll need to reference them in your project. The Video Placement IDs act as tags. After setting them up in the Dashboard and referencing them in your project, the Freemium Starter Kit will manage the rest automatically.
Ads Advanced

The advanced options enable you to prioritize ad networks based on the player's region. You can assign your first, second, and third priority ad networks for each major region, including India, Asia, Europe, North America, and South America.
Social Media

Social Media Options

If you want to enable users to share your game on social media, this section helps manage what they share. Here you can configure how users share your game with friends and family. This section begins with general information typically shared on platforms like Instagram, Facebook, or WhatsApp. Start by entering the game's name and a brief description. Next, provide a share URL. This URL should ideally be a redirect that automatically detects the user's device type and directs them to the appropriate app store—Google Play for Android users and the App Store for iOS users. I recommend using onelink.to for this purpose. The share picture should be a high-quality screenshot or logo of your game, hosted online. Images stored locally on your computer will not work. Messages for sharing are categorized into two types: general sharing and bragging. The API allows you to easily select which type to use. Typically, I enable bragging as an option after a player completes a level and set general sharing as part of a daily quest that offers a substantial reward. For ideas on what to include in each of these sections, please refer to the screenshots and the provided example game.
Facebook Options

If you've decided to use Facebook, your first step is to download and install the SDK. Failing to install the SDK before enabling Facebook in your project will cause compiler errors. The setup process is somewhat unique. Once you've registered your game with Facebook, you'll need to access the Facebook settings. This can be done either through the menu in the Facebook SDK or by clicking the button I've provided, both of which lead to the same place. In the settings, the most critical details are the App ID and Client Token you received upon registering your game with Facebook. Additional options and their explanations can be found on the page where you downloaded the SDK. After filling in all the necessary information, you must click "Build SDK Package" at the bottom of the page. Back in the Freemium Editor, click the "Read Facebook Settings" button to inform the Freemium Starter Kit (FSK) of your configurations. This step is essential because, although the Facebook SDK requires you to set up before beginning to code API calls, the FSK handles most of the coding for you. It just needs these details to function correctly.
Twitter Options

If you've chosen to integrate Twitter, an SDK is not necessary since most functionalities are handled through their API. The basic option enables users to like and follow your company or game page on Twitter. If you want users to share your content on their feeds, you must register your game with Twitter and obtain a key and secret. Note that registering with Twitter involves a review process of your game, which cannot be completed until your game is live.
Audio System
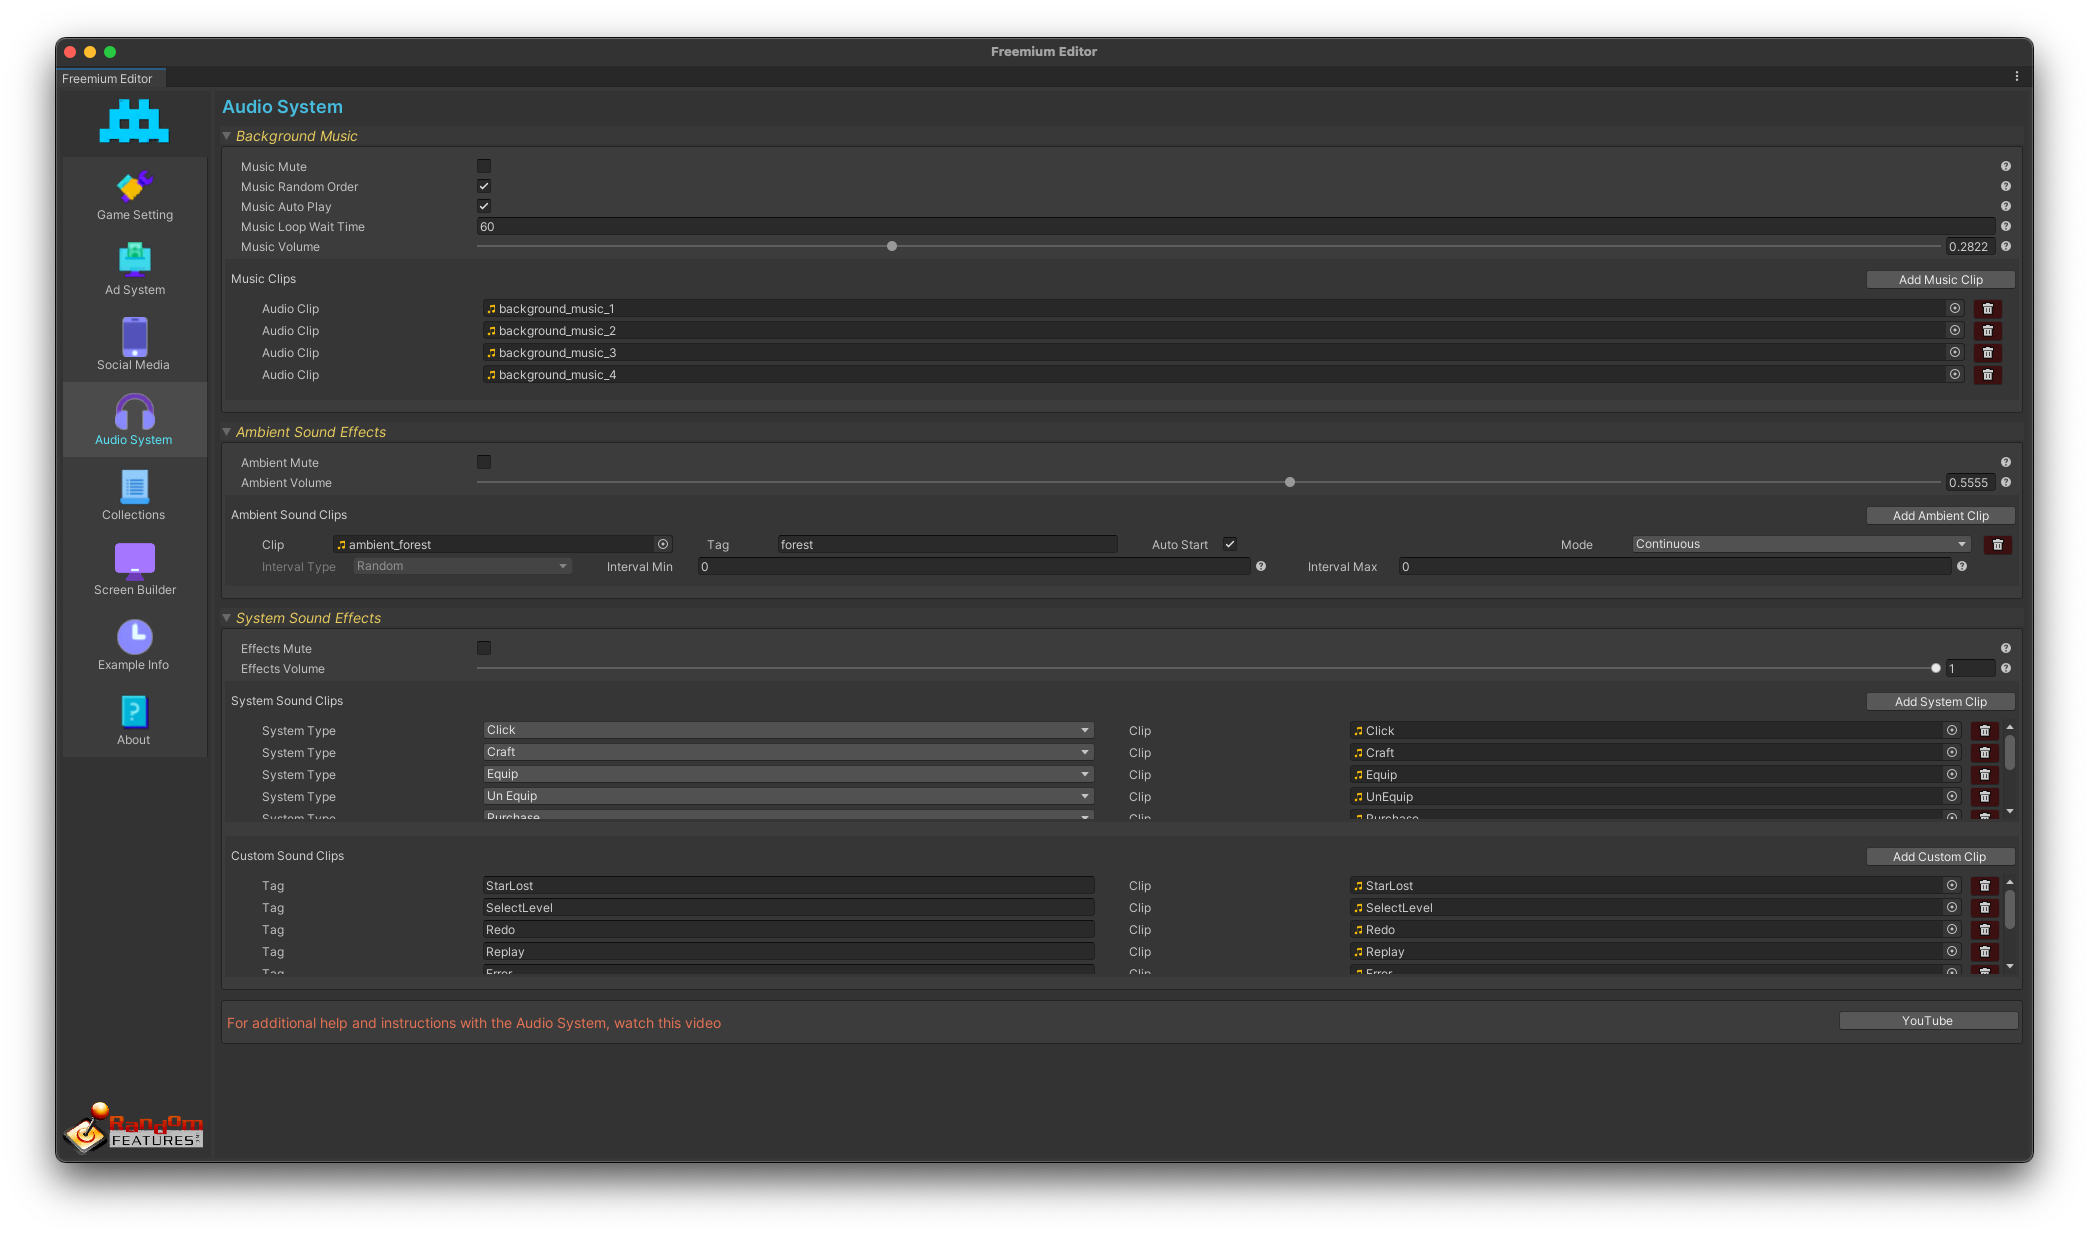
Background Music

Background music settings allow you to create a playlist for continuous background play. You can manually select any song to play at a specific time using an API call. Alternatively, activating the Autoplay feature lets the system randomly pick songs for you. After a song ends, it smoothly fades into the next. With the Music Loop Wait Time feature, you can set a specific duration for each song to loop. The song will continue to loop until this time period ends, and then it will complete its current playthrough before transitioning to the next song. The interval timer resets with the start of each new song. If a song's duration exceeds the set interval, it will play in its entirety just once before moving to the next track.
Ambient Sound Effects

Ambient sounds are background noises that enhance your game environment without being linked to specific events. These sounds can be continuous, like rain or the chirping of crickets, or they can occur randomly, such as intermittent birdsong. Each sound can be set with its own interval timer, creating a natural and varied auditory landscape. These sounds contribute atmospheric depth by playing either continuously or at intermittent intervals. Unlike background music, multiple ambient sounds can play simultaneously, enriching the audio environment.
System Sound Effects

This feature allows you to associate sound effects with specific system events, such as opening UI screens, clicking a button, crafting an item, or making a purchase. There are over 30 system events available for sound assignment. The designated sound effects will automatically play when these events occur in the game. Moreover, you can set up custom sound effects that can be triggered at any time via a simple API call. For instructions on how to implement this, please consult the example game provided.
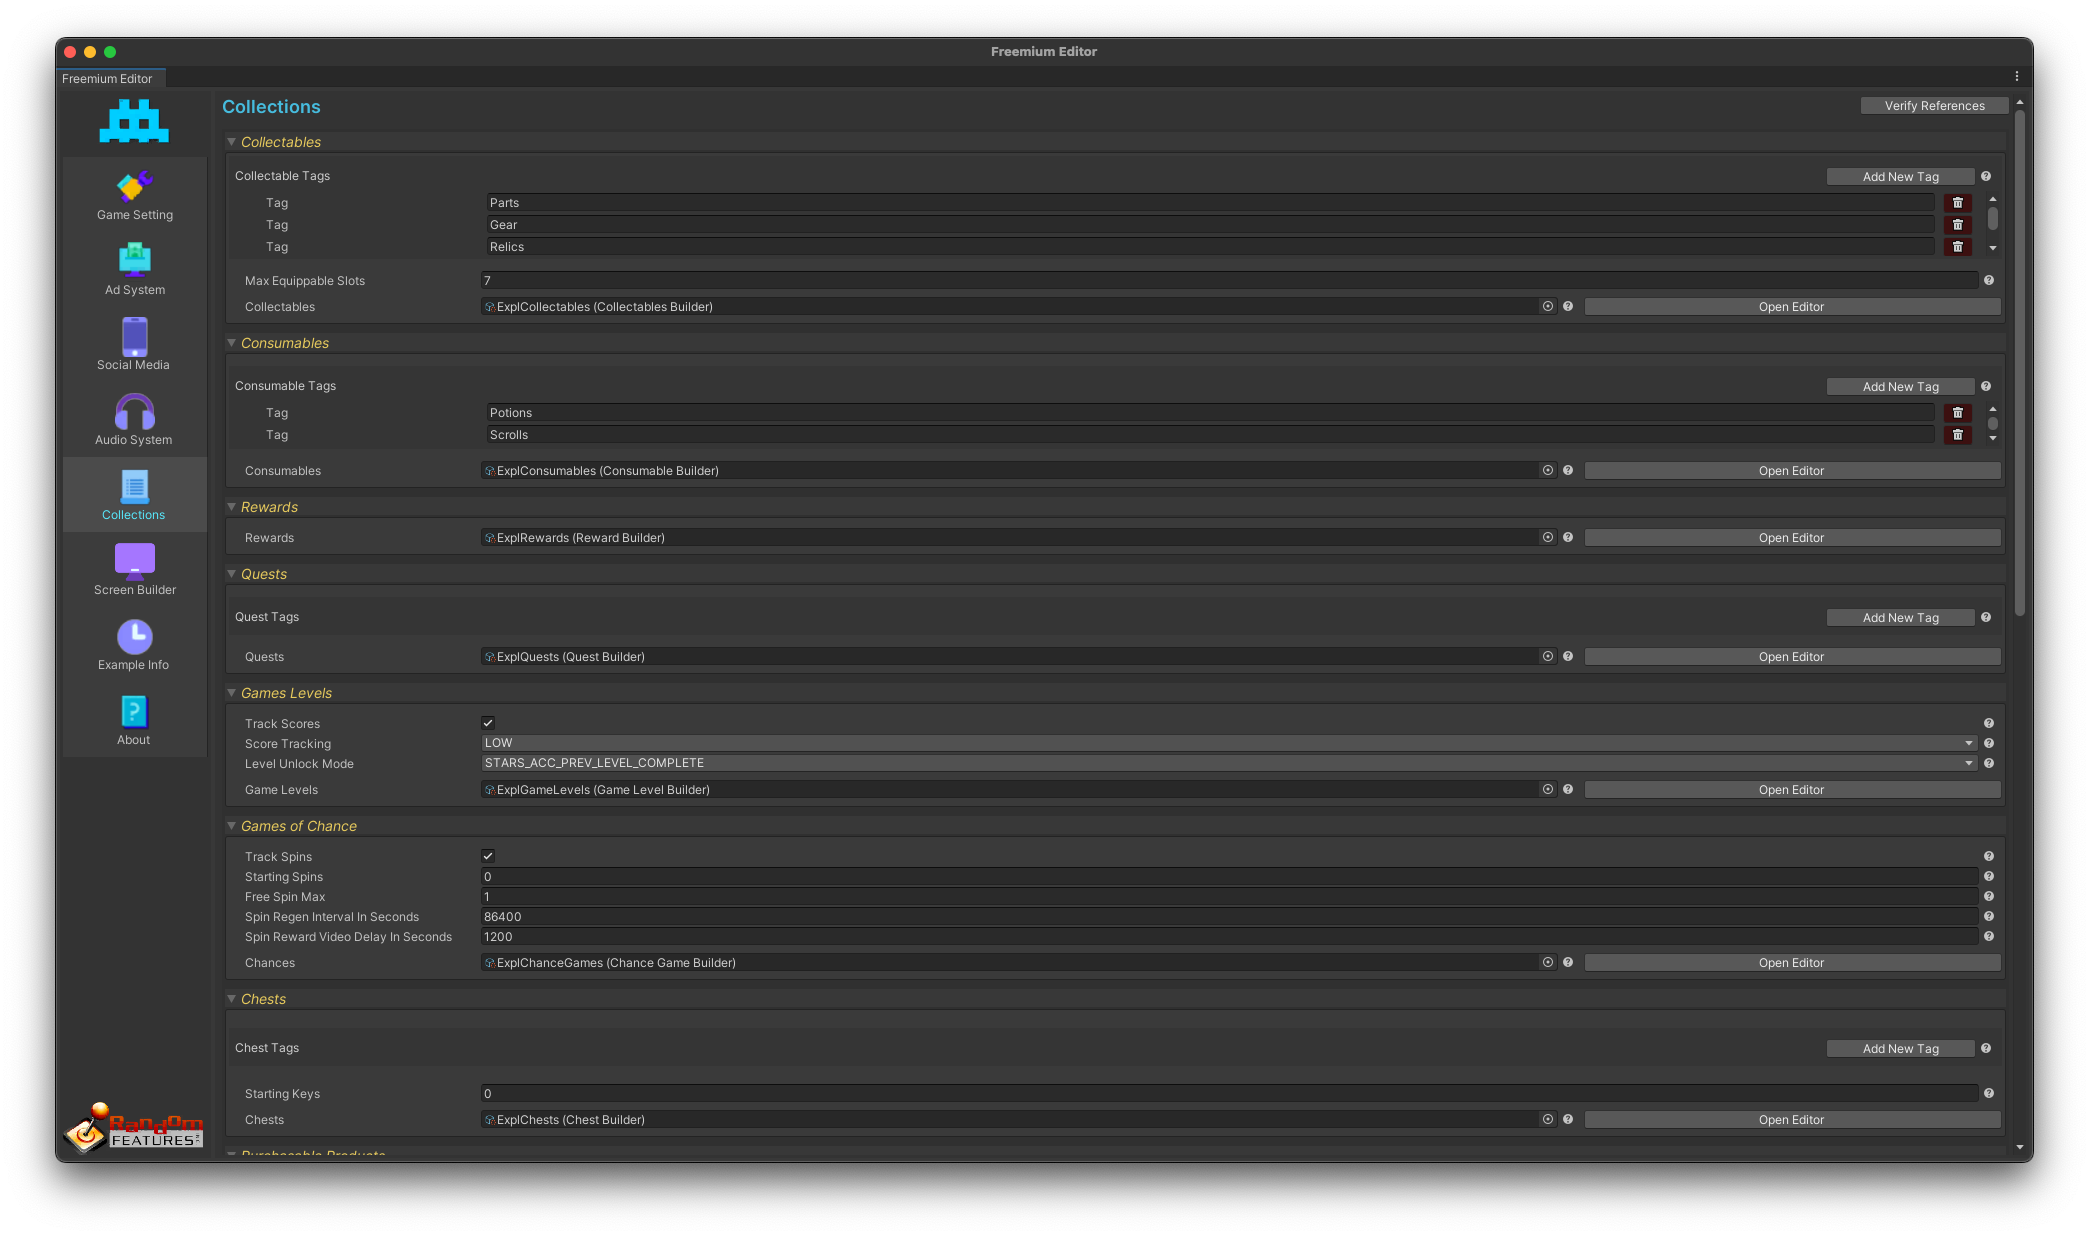
Collections
Verify References

Collectables

Collectables are non-consumable items that players can store in their inventory. Each collectable can have various attributes: they can be craftable, equippable, provide stat bonuses, or be used as ingredients in crafting other items. For example, a ring might offer a 10% bonus to coin collection when equipped, or a glass bottle might be required to craft a healing potion. Tags: Once established, these tags can be assigned to each item to facilitate organization and searching within the inventory. Max Equippable Slots: This defines the total number of items a player can equip at any one time. If this capacity is reached, the system will automatically prevent the player from equipping additional items. To manage these items, click on "Open Editor" to access the Collectable Item Editor screen.
Consumables

Consumables are inventory items that trigger a specific effect when used. For instance, a consumable might restore health, expand inventory limits, or generate a protective shield. These items can be crafted from various combinations of collectables and other consumables. Tags: After you set up these tags, you can assign them to each item to assist with organization and efficient searching within the inventory. To manage these items, click "Open Editor" to access the Consumables Item Editor screen.
Rewards

Rewards are given to players as incentives or acknowledgments for their achievements within the game. These rewards can include a variety of items such as collectables, consumables, coins, gems, and stars. For example, when a player purchases a potion from the shop, it is the Reward System that adds this potion to their inventory. Similarly, the Reward System is responsible for distributing rewards when a player wins a level, completes a quest, or crafts an item. Basically, any time you need to give something to the player, use the Reward System. To manage these items, click on "Open Editor" to access the Rewards Item Editor screen.
Quests

Quests provide players with goals that aren't directly tied to gameplay, serving as a motivational tool. You can design quests to encourage behaviors players might otherwise overlook. For example, you could create a quest that rewards players for sharing the game on social media. Quests can also be used to monitor and reward a variety of in-game actions, such as opening shops, making purchases, crafting items, or accumulating specific resources. This system helps to engage players by rewarding their diverse activities within the game. To manage these items, click on "Open Editor" to access the Quest Item Editor screen.

Game Levels
If your game features multiple levels, this section allows you to configure them. You can lock levels until players collect a sufficient number of stars, establish rewards for completing each level, and set parameters for replayability. Score Tracking: This option lets you specify whether a higher or lower score is more desirable. Level Unlock Mode: Enables you to define the criteria needed to unlock each level. This setup helps tailor the progression system to enhance player engagement and challenge. To manage these items, click on "Open Editor" to access the Level Item Editor screen.Games of Chance

Games of Chance manage random rewards within your game, such as a slot machine or a spin-the-wheel game. In this section, you designate the prizes and the percentage chance that a player wins each prize per attempt. Attempts at these games are referred to as "Spins," which players can acquire through purchase, gameplay wins, discoveries, or other methods. You will find an option to include Spins when setting up Rewards. Free Spin Max: This sets the maximum number of free spins a player can hold at one time. Spin Regen Interval: This defines the waiting period for a player to earn a new free spin after using one. Spin Reward Video: Players can earn a free spin by watching a video ad. This setting determines how long they must wait before they can watch another video to earn another free spin. To manage these items, click on "Open Editor" to access the Games Of Chance Item Editor screen.
Chests

Collections Continued Purchasable Products: "Purchasable Products" are items available in the game store. Players can acquire these items using various methods: locally with in-game currency like coins or gems, or by watching ads; and remotely as in-app purchases using real-world currency. Once a purchase is completed, the Rewards System automatically adds the item to the player's inventory or updates their stats as needed. Tags: Once you set up these tags, you can assign them to each item to aid in organizing and efficiently searching within the inventory. Unity IAP: Before enabling in-app purchasing, you must install the Unity In-App Purchasing service through the Services tab to avoid compiler errors. To manage these items, click on "Open Editor" to access the Purchasable Item Editor screen.
Achievements

Achievements serve as badges or trophies that recognize player accomplishments within the game, essentially offering bragging rights. For instance, while the game may only require players to collect 100 stars to win, there might be 150 stars available in total. Achievements can be used to acknowledge the extra effort players put in to collect all 150 stars. These achievements can be distributed as part of the Reward System or can be manually triggered within the game script as necessary. To use Achievements, you must turn on the Leaderboards. To manage these items, click on "Open Editor" to access the Achievements Item Editor screen.
Leaderboards

Leaderboards are remote scoreboards hosted in the cloud, allowing players to submit their high scores and compete with others. Depending on your game's design, you may need one or several leaderboards. To set up leaderboards, use the "Open URL" button to navigate to the Google Play Games website and install the Unity plugin. Ensure this plugin is installed before activating leaderboards in your game to avoid compiler errors. To manage these items, click on "Open Editor" to access the Leaderboards Item Editor screen.
Notifications

Notifications may seem like they are remote messages pushed to the player's phone, but they are actually generated locally. These notifications are an effective tool to re-engage players who haven't interacted with your game in a few days. You can set up notifications with a timer that prompts players to return to the game after a period of inactivity—typically 3 or 4 days. If the player returns to the game during this period, the timer resets, always ready to act after a new period of inactivity. Before enabling Local Notifications in your game, ensure you install Mobile Notifications version 1.3.2 or newer using the Unity Package Manager to avoid compiler errors. To manage these items, click on "Open Editor" to access the Notifications Item Editor screen.
Daily Prizes

The Daily Prize feature monitors the time since a player's last session and awards a prize if the player returns on a new day. These prizes serve as great incentives for players to keep engaging with the game. Tags: Once you establish these tags, you can apply them to each item to help organize and facilitate efficient searching within the inventory. Renew Type: This setting controls when the next daily prize becomes available. You can choose for it to renew on the next calendar day or after a specific amount of time has passed since the last prize was claimed. To manage these items, click on "Open Editor" to access the Daily Prize Item Editor screen.
Events
The Event Tracker allows you to monitor and respond to a wide range of data. The system automatically generates a notification for events such as the number of times the game has been played, total gameplay duration, days since the first play, days since the last play, or specific dates like Halloween. Simply select your data point, and the system will issue an event message once your predefined threshold is met. Search Tags: After setting up these tags, you can assign them to each item to enhance organization and improve search efficiency within the inventory. Event Tags: These tags help you identify the type of event that has been triggered, making it easier to manage and respond to different interactions within the game. To manage these items, click on "Open Editor" to access the Event Tracker Item Editor screen.
Screen Builder
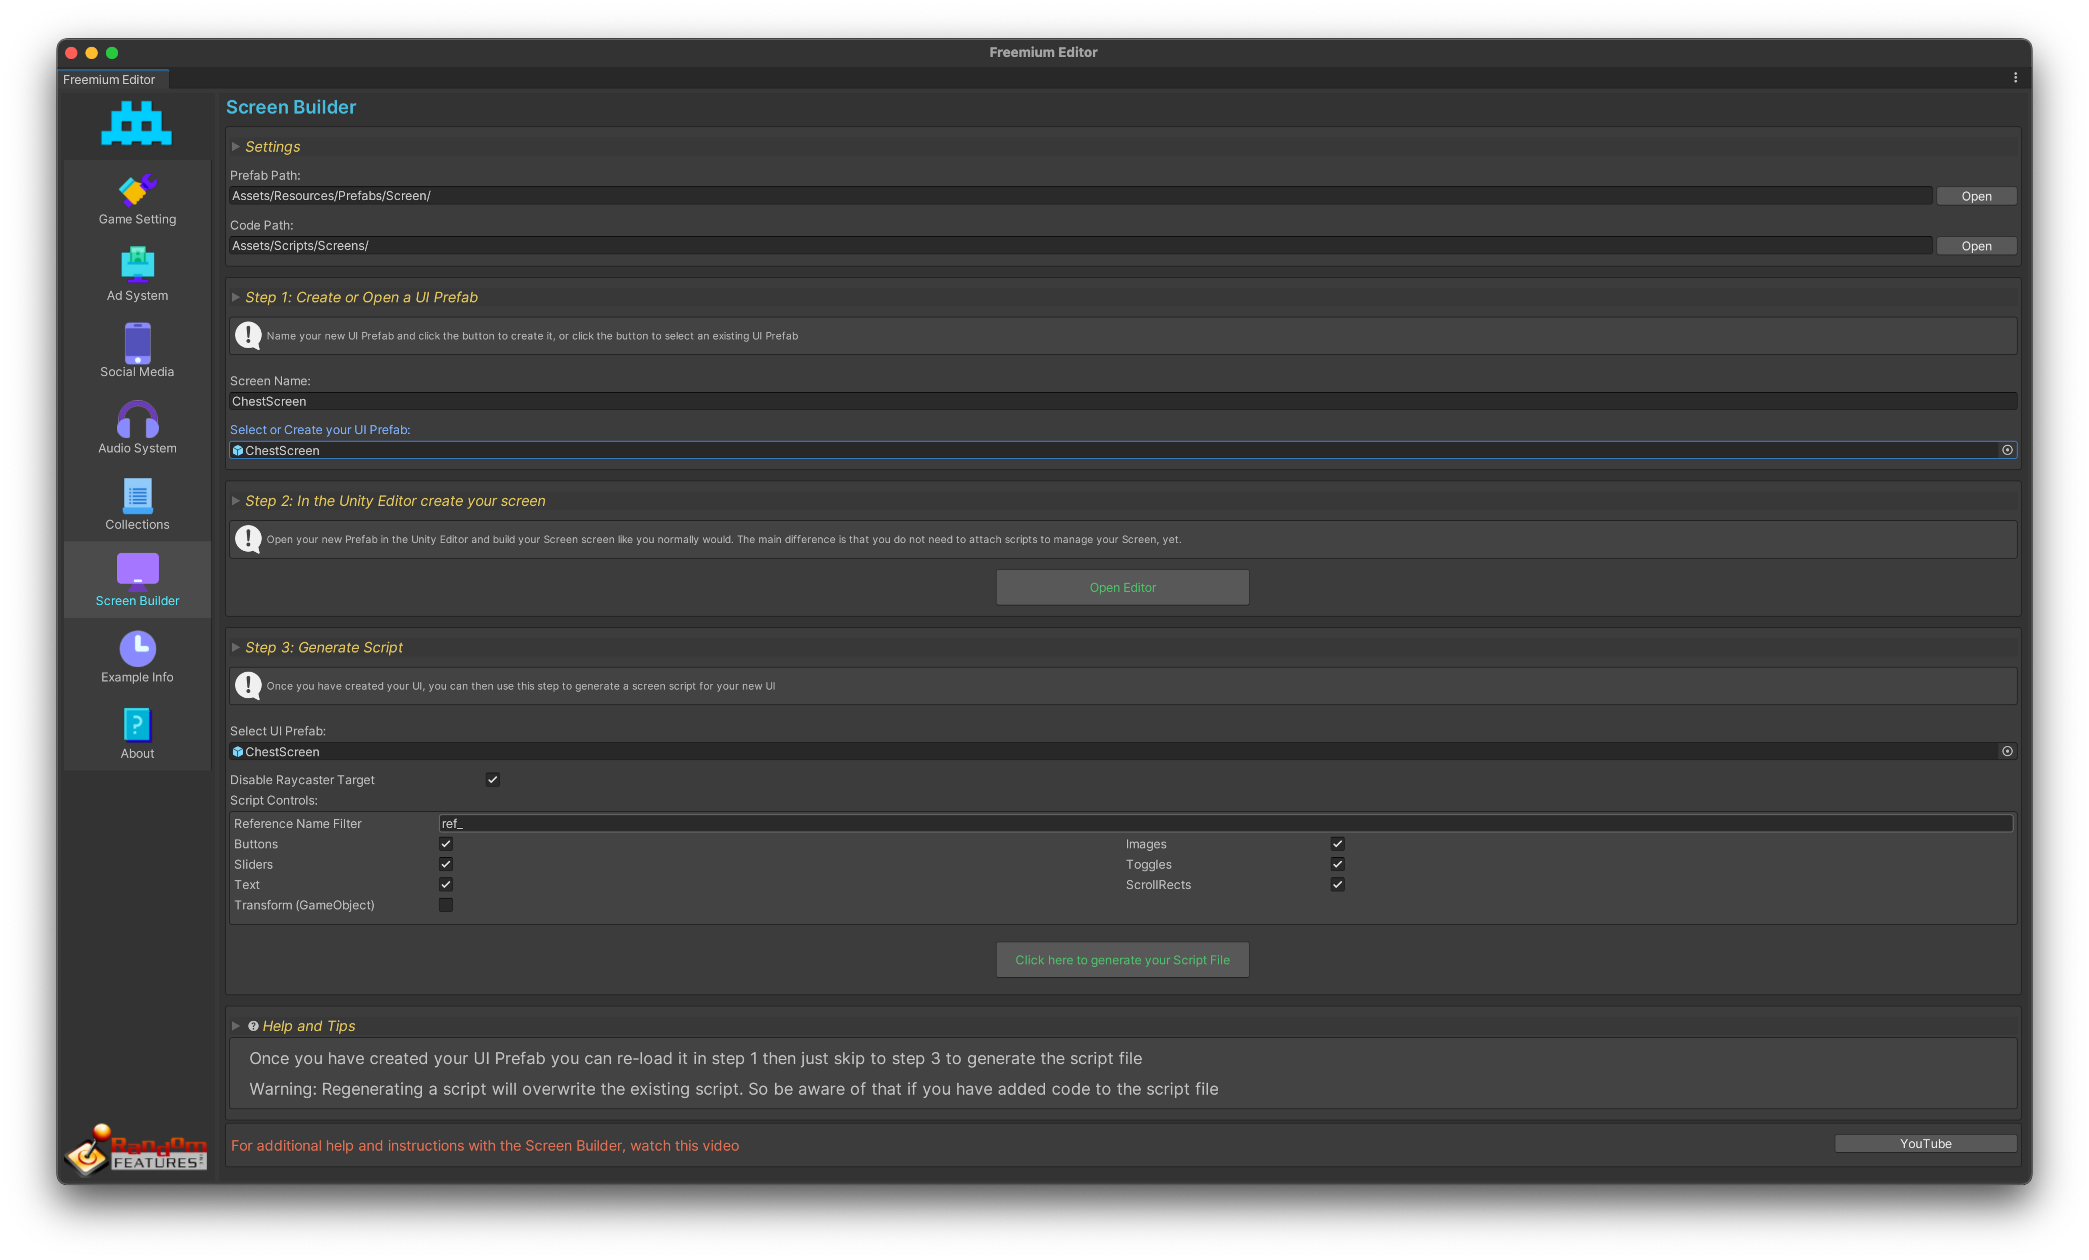
Settings

These are the paths the Screen Builder will generate the base prefab and script file for your use.
Step 1

In this step, the Screen Name is important because it will determine the prefab and script names. In both cases, if an object already exists with that name, it will be overwritten with no undo. You may also select an existing prefab UI to edit or generate a script.
Step 2

This step has a button that will open the prefab selected in Step 1 in the Unity Editor.
Step 3

This step generates a script for the selected prefab. From here you can control how the script generator runs. Disable Raycaster Target: Turns off raycast target for UI objects that do not receive input. Reference Name Filter: Transforms, images, and text controls may or may not need a script reference. By default, Screen Builder assumes that they do not, so to help Screen Builder identify which of these it should create a reference for, you can identify them by adding this value "ref_" to the beginning of the control name. The default is “ref_” but you can change it to suit your needs. Check Boxes: Tells the script generator to create references for the selected control types. Transforms, images, and text controls will still need the Reference Name Filter as part of their name. Transform is unchecked by default because every object has a transform and it is a waste to parse through them all unless you specifically want to get a reference to one of them.

